
Here's how I do it: (if you have safely worked with fiber reactive dyes you can skip ahead to the fun part!)
First and foremost - SAFETY...always! I use Procion MX fiber reactive dyes. They are micro-powdery and you do not want to inhale them! Working in a draft-free space, you should use a respirator, long rubber gloves, and I also use a small cardboard box lined with damp paper towels to catch any dye powder that may fall when adding it to the mixing container. Keep a small/medium size bucket of water nearby for rinsing your tools and gloved hands as you work. NOTE: any tools you use for dyeing must not return to the kitchen! I bought a set of measuring cups and spoons at the dollar store that I keep in the studio. I also picked up some bottles at my local beauty supply store that have a capped tip top. They are meant for hair dye, but they work perfectly for this. They have measurement lines on the side for water level, and they make it easy to shake mix the dye as well as squirt apply it.
 These safety measures apply to any kind of dyeing. So also does the way I prep my fabric for dyeing. I use 100% cotton, usually premium Kona. I pre-wash with Synthrapol, and pre-dry as well so that any shrinkage happens before I divide it up. Lesson learned the hard way...I once pre-cut fat quarters and when they came out of the wash they were slim quarters... :) Anyway, once I've done that I measure and tear whatever sizes I wish to dye. I tend to work in FQ's, but not always.
Next, the fabric goes into a soda ash solution for an overnight soak. I keep a large 5 gallon bucket (with lid) of this solution ready to go at a moment's notice. When I'm ready to dye the fabric, I wring out the excess solution back into the bucket (gloves on!) and can keep using it and adding to it as the level goes down from use. I mix about 1 cup of soda ash to 2 gallons of water and mix well. Use your gloves here too! If you want to be really precise you can use pH test strips...aim for 10.5
For snow dyeing I mix the dye a bit stronger than I do for regular dyeing, simply because the snow dilutes the dye as it melts. So, for 8 oz of water I might use 1-2 T of dye powder, depending on the color I'm trying to achieve. I'm not a formula dyer...I just do what the muse tells me to do. I like surprises! As soon as I have measured the powder into the container of water I immediately dunk my measuring spoon into the rinse bucket. If you've never dyed this will be a surprise...the powder is so fine it doesn't look like any is on the spoon, but the water will tell otherwise! Make sure to dry your measuring spoon before using it again.
Mix the dye solution well so that all of the powder is dissolved.
Now to the fun part!
Using whatever container you choose (I use plastic dish pans, again from the dollar store. I love that place!) simply place your fabric in the bottom - I just scrunch it up, 3-4 FQ's per tub - and pack snow to the top of the container. It's fun to imagine what your neighbors are thinking when they see you bringing snow into the garage :)


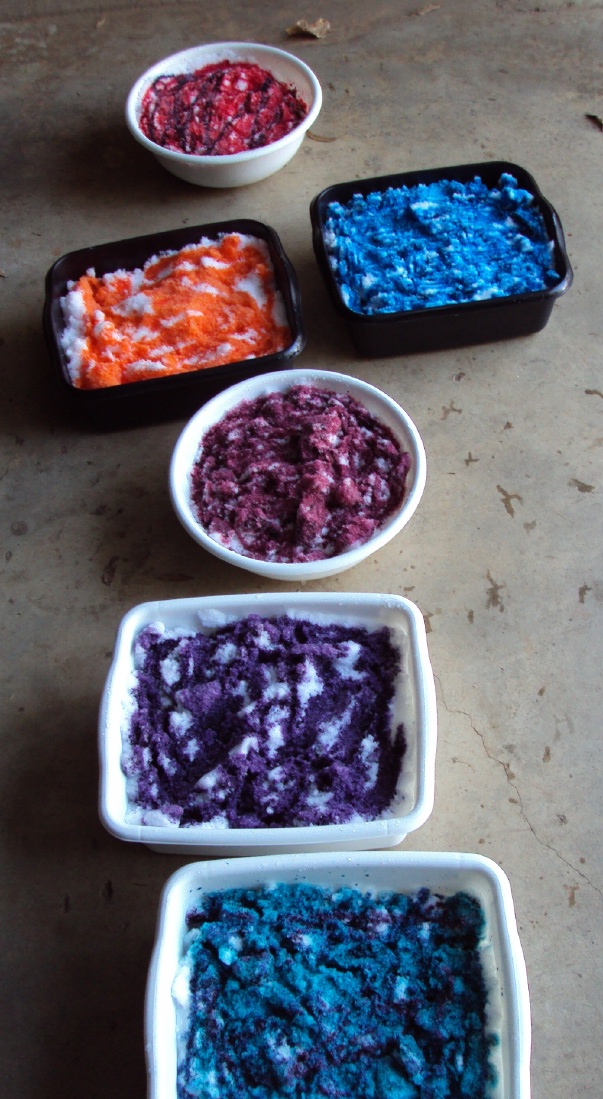
Now comes the waiting. I leave this just inside the garage near the door where it is coldest for at least 4 hours. Then I move it into the studio to continue melting. It looks a bit like a snow cone, but DON'T EAT IT! :) In fact, it's a good idea to make sure this is out of reach of pets and young children. It looks yummy and they don't know better.

I'm melllllttting!!........

Once all of the snow has melted I let it sit and batch for several hours allowing it to reach room temperature. Sometimes it sits for a day or two. I'm a mom...sometimes other things need my attention.
Then comes the not so fun part...Rinse, rinse, rinse!!!
I don't have the luxury of a utility tub, so I just start filling up the washing machine with cold water and carefully dump in the contents of like-colored groups of fabrics (blues and greens go in together, reds and oranges separately, etc.). I will run them through about 4 rinse cycles until the water is pretty much clear. Then they get a full cycle wash in HOT water with Synthrapol with 2 more rinses. Into the dryer and then a good ironing and voila!

Snow dyeing is lots of FUN!!!
8 comments:
Great tute, Karen! I didn't get any snow in Raleigh, just ice. Maybe next time it snows, I will try your method.
Wow, thanks Karen! I tried snow-dyeing with silk and Colorhue dyes, we'll see what happens...if it works I'll link to your blog if that's OK.
Looks like even I can do this! Thanks for the info with photos Karen!
Thanks, Karen, for the instructions. We're having a snow day starting tonight, but I don't even know where to begin looking for the ingredients in my part of the world, so I guess I'll use the downtime to do some research! Thanks again for sharing, Terri in BC
Looks cool....(no pun intended)
Thank you so much for these instructions. There is an article in the Jan 2011 American Quilter but she uses a mesh screen over her laundry tub. Your method is much easier. I live in Ottawa, ON, Canada so I have lots of snow right now. I have been taking dyeing lessons with Elaine Quehl so she gave all of us your blog address.
Thank you for the tut. Your results look fabulous.
excellent tute! I have heard of this process before but never was tempted until I read this post. Now I may have to give it a try. I love processes that encourage serendipity!
Post a Comment